Her kan du søke på mine artikler og koblinger

Showing posts with label mal. Show all posts

Tuesday, 22 September 2015

Gift boxes with templates/ DT Scrappehjertet

Hello everyone.

Today I want to show you two gift boxes that I have made for Scrappehjertet.
You will find thid blog post in Norwegian over at Scrappehjertet.


These boxes are quite qute as presants to friends and family possibly with some card innside.
 The templates on these are made to work with Graphic 45 pictures papers.
 The templates comes in both size. 


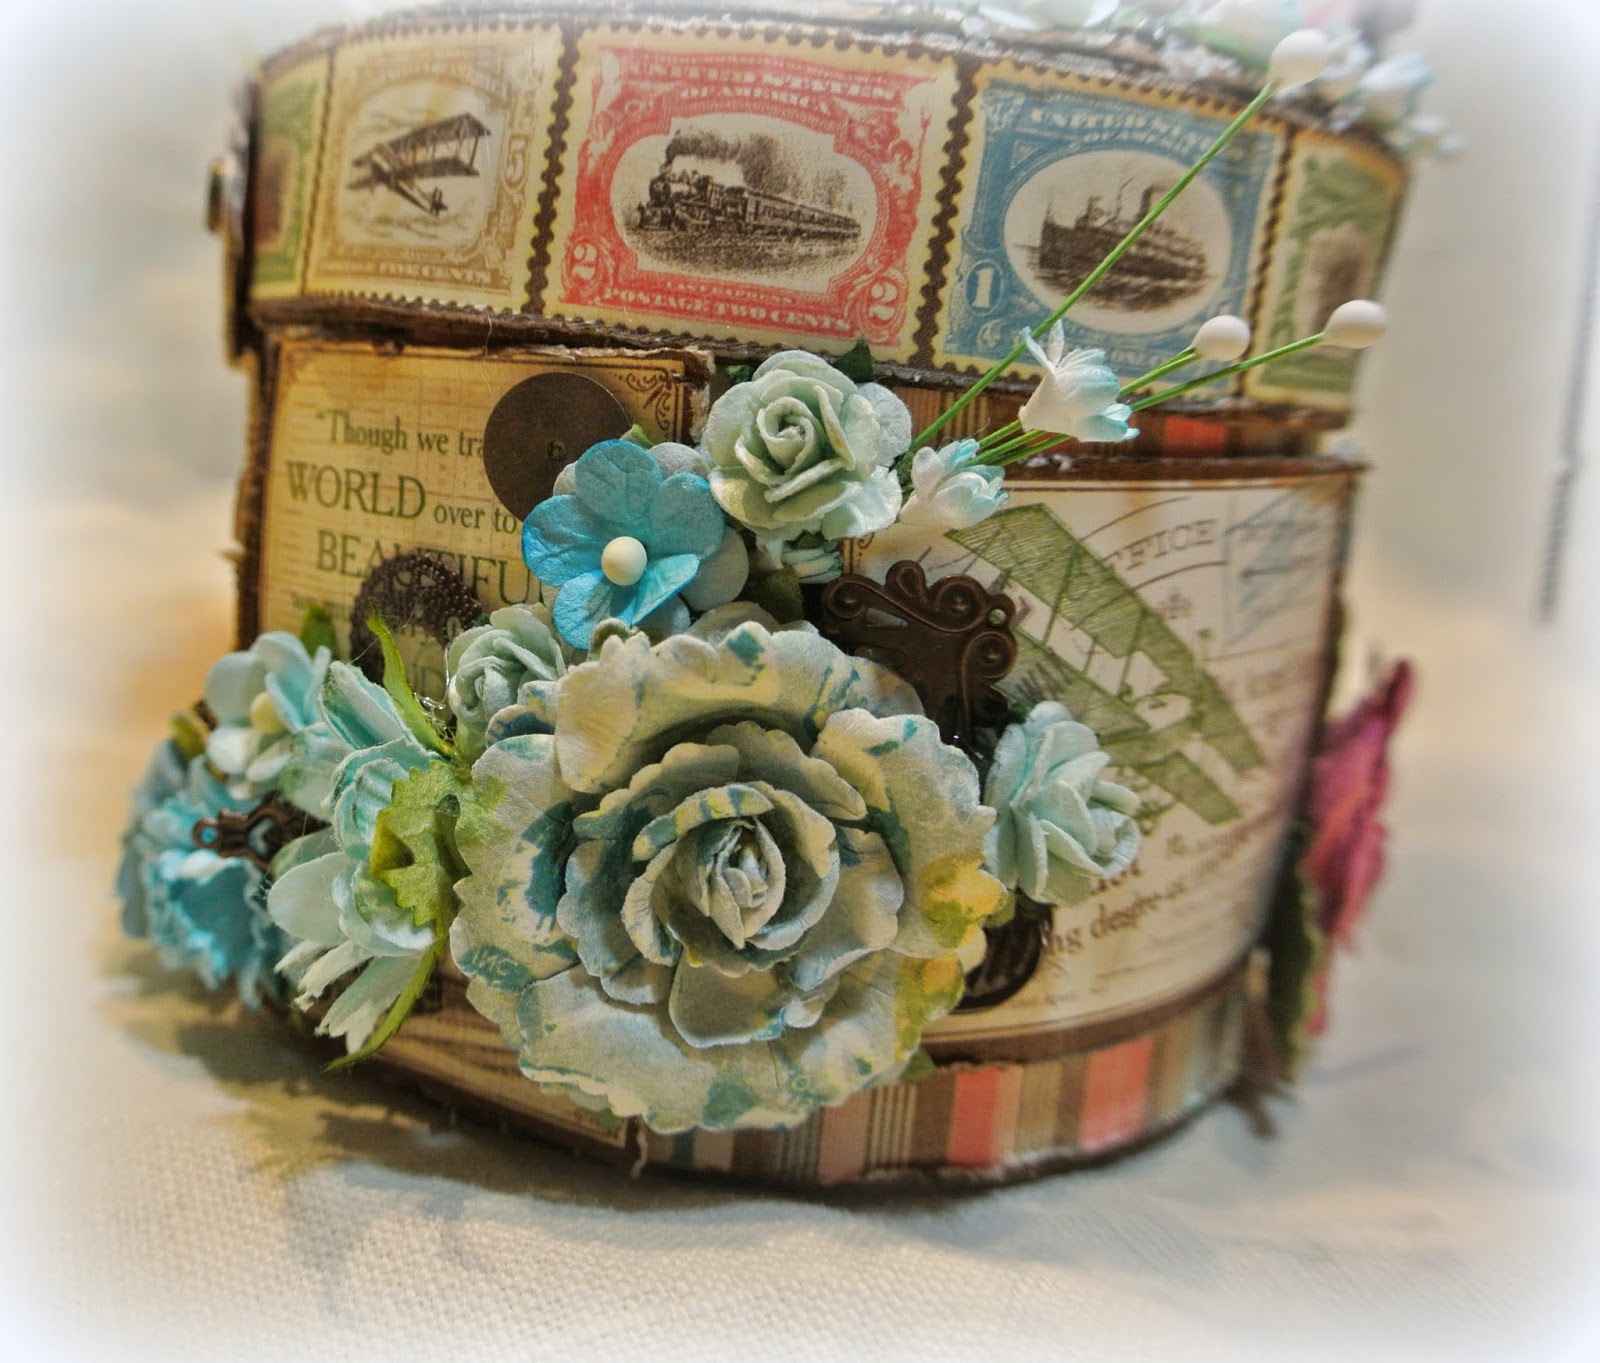
This is the front side of the box


Here you can se the box from different angles.


This is the smallest box. I have used the 8x8 paper pad.


Here is the biggest box, made from 12x12 paper pad.


Template for the large box

Cut 2 sheets to measure 11x25 cm
Score at 2, 4, 20 cm.

Cut 2 sheets to measure 8x6 cm
Score at 1 cm on 3 sides, that will make the measure 6x5 cm.
These pieces will form the lower wall on the box.

Glue the pieces together in the bottom- that wil make the bottom measures 6x11 cm.
Put in the pices for the lower walls.
The box is now ready to decorate. In the end, make two holes in the top, as shown on the photo, and tie the hole thing up.


Template for the smal box


Cut 2 sheets to measure 7x17.5 cm
Score this at 1.3, 3, 13.5 cm.

Cut 2 sheets to measure 5x6 cm
Score 1 cm on 3 sides, that will make the measure 4x4 cm.
These pieces will form the lower wall on the box.

Glue the pieces together in the bottom- that wil make the bottom measures 4x7 cm.
Put in the pices for the lower walls.
The box is now ready to decorate. In the end, make two holes in the top, as shown on the photo, and tie the hole thing up.

Good luck

Thank you for stopping by.

Gunn-Eirill


Sunday, 28 June 2015

Fancy folds with template/ DT Fussy and Fancy

Hello everyone.

It is a new challenge over at Fussy and Fancy Friday Challenge blog.

Here is my contributions.


I am hooked up on "light"mixed media style.


Back of the card.


All the flowers and cut outs are from Wild Orchid Crafts.


Inside the card.

 Template


Cut out this in bazzill.


I have used Graphic 45 papers from the line "Secret Garden"


Inside the card.


Back at the card.

I wish you a great day and thank you for stopping by.

Gunn-Eirill

Wednesday, 13 May 2015

Joy of the Journey

Good morning from Larvik- Norway.

Today I want to show you a project that I made last autum.
I got this idea from childrens TV here in Norway.


To explain what I have done here is not so easy. 
This is paper art, and I dont have templates for this project.


The car is made out of Tim Holtz dies, and you can se howe this is done HERE.


I have made a silhouette file for the hot air balloon from
 a template that I found over at Kirsten Hyde`s blog.


I have used a door pull from G45 so it became a flower basket back on the car.


The flowers that I have used is from Wild Orcide craft (WOC), Prima and Storyteller.


This little lamp is from Prima.


All the small metal parts is from Korthobby.


This small suitcases have I made by hand.


I have used a label holder on the car from G45.


The flower vines is from Prima.


I hope you did enjoy this blog post.


I am entering this challenges


Monday, 9 February 2015

Mal på sjokoladekort

Hei hei alle sammen.

I dag blogger jeg for StampARTic

Her kommer mal på sjokolade kort.
Dette kortet passer til melkesjokolade, 200 gr.


Du tenger et Bazzill ark og et mønster ark til dette prosjektet.

Skjær Bazzill arket på 21x27 cm.

Preg på langsiden 3,4,12,13 cm.


Skjær til 2 biter på 3x3 cm og preg på 1 og 2 cm.

Disse skal monteres som vist under.
 Dette gjør at sjokoladen ikke detter ut av kortet.


Hvis du vil bruke kant punch inne i kortet så er det litt andre mål

Skjær Bazzill arket på 23x27 cm.

Preg på langsiden 5,6,14,15 cm.


Magebåndet lages som følger:

Skjær mønster papir på 5x19 cm og preg på 5,6,14,15 cm.


Panelene har jeg skjært på
 26,5x7,5 cm, denne skal du ha 3 av.
26,5x2,5 cm, denne trenger du 1 av.


Da er det bare og finne frem papir og stæsj og sette igang.

Alle materialene fåes kjøpt hos Scrappehjertet

Lykke til


Gunn-Eirill


Jeg deltar i disse utfordringene


Monday, 5 January 2015

Play with dies/ DT StampArtic

Hello everyone.

Today I am doing a blogpost for StampARTic

 I want to show you an easy way to make 3D project with dies.
Tim Holtz dies is very easy to use in 3D project.
 You can cut out from cardboard, soda can and so one..


I use cardboard to for the construction.
You will need two cars in cardboard.


Cut a strip 7x12 cm, and score on 1 and 6 cm, and then you have to cut small notches on both sides.


You are now ready to glue the strip to the car. Remember to use liquide glue.


One side is glued together.


Both of the car dies is glued on the strip.


Front.


Side.


Rear.


I hope you did understand explanation. It takes a little bit of patience and accuarcy.


Now it is time to have some fun, and decorate the car.


On this project I have used Graphic 45 papers from 
"Come away with me" and "Raining Cats and Dogs"


All the fussy cut is from "Raining Cats and Dogs"


I have used a large quantity of flowers from Wild Orcide Craft.


Back at the car. The kitten is sitting in a door pull from G45.


Here you can see the car from the side.


In the backside on the car I have used a stamp from IndigoBlu.


On the front you can take away the panel, so you can write a greeting. 
I have used magnets to hold the panel with fussy cut on to the car.

I hope you did like this project.

Gunn-Eirill